We just flew back from Indy, and BOY are our arms tired. What a Nats trip it was, and man did we ever learn a lot. But keeping it short, here are 25 things we learned at US Nats.
Frustration Kangaskhan is definitively better
Using Transform Smeargle? Breed for HP Ice
Fried Pickles are incredibly disappointing
Trick Rotom-H@Flame Orb is the secret play against LumChomp
Stempe is too strong at Pokermon
Alex Ogloza is too strong period
Speaking of which, who needs Protect?
Life Orb Aegislash #TheWayOfTheFuture
Zapdos > Talonflame
Talonflame > the meta
Baseball signs… brilliant
Crawdaunt is a spy, even if he doesn’t know it
Hey… genuine shout-out to Pokemon for running a very smooth, very enjoyable tournament! They can do that.
Don’t stay at the train hotel
Noodles and Co. is legit
Free samples are everywhere in the food court, which is just so bizarre
Choice Specs HP Fire Greninja next to Skill Swap Technician Smeargle@Choice Scarf is the plan
That still doesn’t get the guaranteed OHKO on Ray’s Careful M-Mawile
Don’t give the guy without cell reception the job of texting people
Choice Scarf Heal Pulse Gothitelle + Final Gambit Staraptor
Juniors were born after Swellow was created
Dealing random Pokemon cards can be made into a variety of games
Torkoal: on Ray’s 2013 Worlds team, made T4 Juniors US Nats. On to something?
Today I’ll be discussing a topic a lot of players have been murmuring about. It’s not a fun one to bring up, and it’s a bit self-contradictory to bother writing a whole article about a topic no one should bother bringing up, but here goes:
I call hax!
It’s easy to get riled up over some bad luck. A lot of players liken the luck aspects of Pokemon to the odds of bad beats in Poker. No one feels they deserved to lose when the odds were in their favour, and no one wants to hear about someone else’s bad beat unless there’s some funny story or interesting lesson involved. Simply put, unless you have something relevant to discuss, you’re just complaining if you bring up the details of your loss and the end message is “I don’t feel I deserved to lose.”
You’ll notice I used the word “deserved,” as if people are owed something by the game that will have our RNG rolls land as we want them to when we need them. But of course we aren’t owed anything, and we don’t “deserve” to be rewarded with a win every time we make the right play. We deserve to be rewarded with a win the proportion of the time that play would win us the game. If you miss a Play Rough and it costs you the game, that’s the 10% risk that comes with running Play Rough. But I doubt you often think “thank goodness Play Rough hit” the other 9 times you needed a Play Rough to win.
“Negativity Bias” is the term given to people’s tendency to focus on the negative things that happen rather than the positive. It’s easy to forget the 9 times you won off of Play Rough when you’ve experienced the 1 time you lost off a miss. If you need convincing that the RNG isn’t out to get you, try this: over the next ~20 games you play, count the number of times your 90% accurate move hit or miss. I would be surprised if anyone hit less than 75% of their Overheats or Draco Meteors. And I imagine anyone that is at such a low ratio could bring it up to 90% with an increased sample size.
Curse you RNG gods!
This article comes in the wake of the May International Challenge, where trainers played 60 games over 3 days. If you used a 90% 60 times in your 60 games, you’re supposed to miss 6 of those over the course of the tournament! Six negatives is plenty of negative experience to remember. Those 54 games where things went as planned are folded and stored in the back of your mind never to be seen again. It’s a fallacy to say you deserved those wins, but didn’t deserve your 6 losses due to “hax.” The two are tightly intertwined. That’s the deal you made with the devil.
How to improve
It’s all fine and good to recognize that “hax” are part of the game; that we won’t always win a game we expected to. But the more important part is to recognize how to avoid such a situation in the future.
Recently, I attended a local premier challenge finishing 3-3. I think I can say that my head wasn’t in the game that day, but I can also say that luck wasn’t on my side. In round 1, at the end I lost because I missed a Will-o-Wisp. In round 3, I lost because I became paralyzed (Thunder Wave) and was fully paralyzed to prevent my game-winning attack. In round 4 I lost because my opponent got a ~35% damage roll.
But if I left my tournament report there, I wouldn’t be doing things justice as far as the true reasons I lost.
In round 1, I also made a foolish switch, saving my Bisharp from a Scrafty, but letting Venusaur become Perish-trapped. And what’s worse is that afterwards, I failed to see through obvious perish trapping plays and I hit a Protect once or twice when I probably should’ve seen it coming. But what’s more is that I could have recognized that my only out to not fainting to Perish Song was to double target their Gothitelle and not worry about the Politoed, meaning I should have ignored the urge to be clever and predict their Protects. It wasn’t a great start to the day. The game ended with my lone Rotom vs. his lone Scrafty, and Rotom missed a Will-o-Wisp required to tank his next Crunch and deal burn damage over a couple turns before finishing him off with Thunderbolt. I could blame the Will-o-Wisp, but that was a sloppy game on my part and I didn’t need to put myself in a position where I had to rely on Will-o-Wisp in the first place.
Sure, 85% of the time, when I played the way I did, I would have still won. But had I played a little smarter, had I sacrificed the Bisharp immediately, had I recognized a win condition and coupled that with some basic prediction, I would have won 100% of the time. That’s 100% my loss.
My face when I stare down a Rotom I can’t KO
I don’t have as in-depth a story involving my Gyarados being paralyzed. The game is a bit fuzzier in my memory, but I don’t recall any egregious misplays. Of course that doesn’t mean I didn’t make any. I think there was a turn I should have Protected, but didn’t without a good reason. What was really odd about that game was that his Rotom-H didn’t have an electric attack. I was dodging in and out, Intimidating with Gyarados trying to avoid a Thunderbolt when it turns out I didn’t need to. And at the end, I was Thunder Waved to prevent Gyarados using Ice Fang on Garchomp for the win. Accounting for accuracy, I could say that I should have won that scenario ~70% of the time, but let’s get real here:
Any other Rotom would have been carrying Thunderbolt and I would have lost that turn anyways had he used Thunderbolt instead of Thunder Wave. I can’t blame my luck when the same game played with an extremely standard moveset would have resulted in my loss. I was playing with the expectation that he had Thunderbolt, and I still would have fallen victim to it. As such, I can’t even call my Gyarados switching a misplay to watch for in the best of 3, because it wasn’t what lost me the game. Had he run Thunderbolt, that was my loss to take 100% of the time.
My third loss , both myself and my opponent were pretty done with the day, and just there for fun. We both aspired to much higher than starting the day 1-2. Neither of us were really concentrating very hard on the match and we both slipped up here and there I think. I lost the game when his Mega Gengar Shadow Balled my Gardevoir for KO. I knew it was a bulky Gengar and had done calcs before to see if my Gardevoir could survive its Shadow Ball. I misremembered and instead of Sucker Punching the 1 HP M-Gengar, I used Dazzling Gleam and planned to Assurance the Ferrothorn sitting next to it. But the true calc is that I survive Shadow Ball the majority of the time, not all the time. Had I remembered this, I probably would have played differently.
Your point?
My point is that each of my 3 losses that tournament I could be blaming on “hax.” I lost a game on a 15% chance, a 29% chance, and a 37.5% chance. Each loss I could attribute to being on the receiving end of poor luck, but I can’t look back at that day as anything other than losing 2 games I know I could have won with better play, and 1 game where I am sure better plays could have been made, though I don’t recall them specifically. Each of those losses were completely deserved. My goal as a player should be to put myself in a situation where the RNG has as little role in determining the winner as possible. I failed to do that on 3 separate occasions and 3 times in a row it came back to bite me. For that, I can only blame myself.
To grow as a player and become better, the only way you should ever reflect on a tournament is not to say “I would have won if only this hadn’t happened.” Instead, ask yourself “how could I have played differently, or built my team differently to avoid my losses?”
I want to clarify, I don’t think that every loss to “hax” can be attributed to subtle personal errors. Often your team’s move accuracy can’t be altered too drastically without missing out on KO’s. But if you don’t look to all possible sources for your loss, you can’t get better.
I’d love to see Aaron Zheng chime in here with his thoughts after his famous Worlds Top 4 match where he missed 5 Will-o-Wisps in a row, and Ryosuke played a strategy (paralysis + confusion) designed to abuse probabilities. Looking at his series, I could say he was robbed of a win in one of his games due to bad luck. But in the third game of that series the RNG favoured Aaron if anything, and yet he still lost. So can I really say that he was robbed of a win earlier? As a study experience, I think that series is an amazing one to reflect on how luck affects the game. I strongly encourage everyone to give it a watch if they can:
Luck Probability is part of the game. As players, we can choose to follow one of two ideals:
We can abuse probabilities and try to generate situations where the RNG rolls in our favour more often than not.
Or
We can choose to avoid probabilities and try to generate as few situations where the RNG determines the outcome of a match as possible.
Both extremes hold merit, but you should recognize the faults in either approach and where in this continuum you lie. Nonetheless it is foolish to blame the RNG without first acknowledging how well you’ve ascribed to your choice of ideal.
Whether you embrace the RNG or refuse to acknowledge its presence, it is a ubiquitous force in the game of Pokemon.
Hello Hat Lovers! Instead of posting one of my own teams I’m going to try and help players build their own. Today I’m going to look at some common metagame threats that your team will need to be able to deal with if you want to do well. Alternatively you could treat this as a way to find a starting point for your team and ways your opponent will try to deal with you.
For whatever reason TPCI decided that not banning Dark Void was a good idea. Kangaskhan has Fake Out on the first turn to make it easier for Smeargle to get off a Dark Void. After that Smeargle can Transform into Kangaskhan and now your two sleeping Pokemon have to deal with two Mega-Kangaskhan. This strategy has a ton of faults in it, although many of them have to do with the RNG and can’t be exploited.
The first issue with this strategy is that Dark Void only has 80% accuracy. This means that you only have 64% chance to put both the opponent’s Pokemon to sleep. The other problem with this is that if your Pokemon get the turn 2 wake you’ll be able to take this combo down without too much trouble.
These are concerns for the user of this combo, but while these will prevent them from winning every time you still want to beat them even if you’re not one of their lucky opponents. So here are a couple of ways to beat this combo:
Insomnia Gourgeist: Gourgeist can’t be touched by Mega Kangaskhan, and if it uses Insomnia Smeargle can’t hinder it either.
Safeguard: Here at VGC TCG w/Hats we love ourselves some Safeguard. Meowstic can block Fake Out from Kangaskhan with Quick Guard while its partner can deal with Smeargle or stop it from using Dark Void for a turn. Once the Fake Out turn has passed Meowstic can set up a Safeguard or start Charming their Kangaskhan.
Lum Berry: By giving one of your Pokemon Lum Berry you’ll be able to get the jump on a Smeargle that thought it could incapacitate you with Dark Void.
Venusaur @ Black Sludge -Giga Drain / Energy Ball -Sludge Bomb -Sleep Powder -Protect
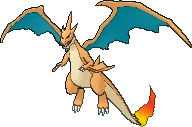
The new Politoed / Kingdra of VGC 2014. Mega-Charizard’s Drought activates Venusaur’s Chlorophyll and boosts the power of its Fire moves. This lead generally double Protects on the first turn to active Chlorophyll before Venusaur can be attacked. After that you need to deal with Sun boosted Fire moves from Charizard’s base 159 special attack and Venusaur can start putting your Pokemon to sleep with Sleep Powder. This combo is harder to block when your Pokemon are put to sleep, but there are still plenty of ways to deal with the combo:
Garchomp + Talonflame Garchomp will always out speed standard Charizards and OHKO with Rock Slide, while Talonflame takes out Venusaur with Brave Bird. This combo only fails if the Venusaur is carrying a Coba Berry.
Kangaskhan / Mawile + Meowstic On the first turn Meowstic can set up a Safeguard while Kangaskhan Fake Outs into a Protect or Mawile Protects itself to be safe. On the second turn Kangaskhan can OHKO Charizard with Return and Meowstic either Swaggers the opponent to try for hax or Swaggers Kangaskhan so that it will be at +2 attack. If using a Mawile you can OHKO Charizard with a +2 Sucker Punch and Venusaur can’t touch Mawile.
Rotom-H (with Lum Berry / Safety Goggles) Rotom-H can KO both Charizard and Venusaur with its STAB moves while resisting their common moves (except for Sludge Bomb.) With either Lum Berry or Safety Goggles you’ll be safe from Sleep Powder (Lum Berry also helps against Dark Void, while Safety Goggles shields you from all Powder and weather.)
Opposing Weather + Prediction Having a Tyranitar or a Politoed shuts down Charizard completely and slows down Venusaur. If the opponent goes for a double Protect turn one and sets up the sun you can switch your counter weather in to shut them down. Mega-Tyranitar can also control the weather with proper prediction, so long as you Mega-Evolve either on the same turn or on a turn afterwards you’ll have the last say in the weather war.
Mega Mawile Mawile @ Mawilite -Play Rough -Iron Head -Sucker Punch -Protect
Mawile is one of the most popular Mega Pokemon right now. On top of its insane attack stat Mawile has a ton of resistances, good defensive stats, and Intimidate before Mega-Evolving. Like most physical Pokemon Mawile can be handled by burn and repeated intimidates. Mawile’s STAB moves are both resisted by most Steel types and Fire types, just be sure that whatever you decide to attack Mawile with can survive a Sucker Punch.
Mega Manectric
Manectric isn’t as popular of a Mega as Kangaskhan, Mawile, and Charizard which have higher stats and are easier to use. Regardless, Manectric is still dangerous in the hands of a good player. Volt Switch allows Manectric to use Intimidate over and over again while avoiding attacks heading its way. Before Mega-evolving Manectric supports its partner with Lightning Rod. Our favourite partner for Manectric has been Gyarados, which provides further Intimidate support and enjoys having electric attacks diverted away from it.
Mega Gengar Gengar @ Gengarite -Perish Song -Protect -Shadow Ball -Sludge Bomb / Disable / Hypnosis
We’ve already looked at Perish-trapping before, so I’ll make this brief. Dealing with PT is all about applying as much offensive pressure as possible and finding ways to switch out through Shadow Tag. Volt Switch and U-Turn can save one of your Pokemon from being KO’d by PS, just be sure not to Volt Switch into a Protect on the last turn. Ghost types can freely switch out and their Ghost STAB moves are huge threats to users of Shadow Tag.
Garchomp + Salamence These two have been best friends lately. Double Dragons have been a powerful combination in the past, and continue to be effective despite the introduction of the Fairy type. Its tough to go two battles without encountering one of these Dragons, so you should have at least one way of dealing with them.
The standard Garchomp set is Jolly 252 atk / 252 speed with Earthquake, Dragon Claw, Rock Slide, and Protect. This always out speeds base 100s and is the second fastest Dragon type available after Noivern. Salamence is commonly Scarfed with a Modest/Timid nature and 252 Sp.Atk and 252 Speed. The common moves include Draco Meteor, Dragon Pulse, Fire Blast, Hydro Pump, and Rock Slide.
The first thing that comes to mind when countering dual dragons is to use Fairy types. I’ve been a fan of Scarf Gardevoir which is popular in Japan as an answer to dual dragons. Mawile and Azumarill can KO either with a Play Rough even after an Intimidate, Azumarill gets special mention because it is neutral or resistant to the dragons other moves, while Mawile gets Intimidate before Mega-Evolving.
Another way is to use your own dragons. A Salamence, Noivern or a Hydreigon holding a Haban Berry will likely catch the opponent off guard and allow you to KO their Dragon after they fail to KO yours. Both Garchomp and Salamence have a 4x weakness to Ice, so using something quick like Mega-Manectric with Hidden Power Ice can KO these Pokemon with ease.
Rotom-A
Electric / Water
Electric / Fire
Rotom is possibly the most used Pokemon in VGC right now, although it owes this partially to its multiple forms. The popular forms of Rotom are its wash and heat forms. Rotom has great typing that allow it to wall many common threats. Both Rotom forms resist Fire and Flying, leaving Talonflame without a way to threaten either of them. Rot om-H resists Fire and Grass, so Charizard can’t touch it unless it resorts to Ancient Power, which is only a 2HKO at best. Rotom-H also resists Fairy and Steel, adding Mawile to the list of things that it doesn’t care about. Couple these great resistances with high defences and solid attack and speed stats and you get a Pokemon that fits onto most any team.
Rotom like to spread burn with Will-O-Wisp, so physical attackers tend not to work well against them unless they carry a Lum Berry or Safeguard. If you can resist Rotom’s attacks or just be neutral against them and have high special defence you’ll be fine against them. The issue is being able to KO them before the Pokemon they wall can attempt to sweep.
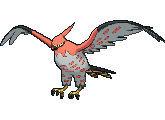
Talonflame Talonflame is a rather frail Pokemon with lower base stats across the board with the exception of its great speed stat. Yet Talonflame is still a threat because of Gale Wings, which gives all its flying moves +1 priority. If most of your team have low defence stats or are weak to Flying you will have a hard time dealing with Talonflame. Talonflame can also set up Tailwind to support its team.
Talonflame isn’t too hard to deal with. Intimidate lowers its already so-so attack stat making it much more manageable. Pokemon that resist both its STAB moves such as Rotom-W, Rotom-H, and Tyranitar will be able to take anything Talonflame throws at them and KO in return. Quick Guard blocks Brave Bird. Another plan is to let Talonflame KO itself through recoil, Life Orb damage, and potentially Rough Skin / Rocky Helmet.
Ferrothorn
Kill it with fire!
If you don’t have any Fire attacks on your team, you will have a lot of trouble with Ferrothorn. Last year I had a game where I Leech Seeded my opponent’s last two Pokemon and they froze Ferrothorn, only for Ferrothorn to survive off of Leech Seed and Leftovers until it thawed out (then got frozen immediately afterwards and thawed out again.)
Having one Fire attacker on your team gives you a way to deal with Ferrothorn but if that Pokemon is taken out you’ll probably lose to Ferrothorn. If you have two Pokemon that can carry Fire attacks your opponent will probably decide that Ferrothorn isn’t a good Pokemon to bring against you.
Conclusion: Next time you build a team, ask yourself: will my team be able to handle these Pokemon? If not you’ll in for a rough time. If your team can handle these threats you’ve probably got yourself a solid team. There are plenty of threats that weren’t covered here, most of which are more obscure and aren’t seen as frequently. If you can develop a good sense of what a team is trying to accomplish from team preview alone you’ll be much more successful in this game.