Author: Starmetroid

It’s a bird! It’s Tomohawk! No, it’s Hawlucha!

“It likes to attack from above.
A maneuver that is difficult
to defend against.”

LLLadies?

Intro

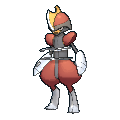
Hawlucha is the one, the only, Flying/Fighting type! This people were clamouring for a Flying/Fighting type for the impressive coverage the dual STAB brings. With both, the most relevant Pokemon I can
think of that resists both is Aegislash then Zapdos, and after that the list runs dry (Rotom-Fan?). So given that information, Hawlucha has some big shoes to fill and a reasonable capacity to do so.
gives it a fair number of awkward weaknesses, like Electric, Ice (we’re already off to a bad start), Flying, Psychic and Fairy. In return, it resists Grass, Fighting, Bug and Dark, and is immune to Ground. Not a great tradeoff in my opinion, but before this gen

Abilities:

Hawlucha gets access to 3 Abilities, Limber, Unburden and Mold Breaker. Initially… I’d be hard pressed to find a reason to use Limber but you’ll see it has its purposes. Both Unburden and Mold Breaker are traditionally viable Abilities for a ‘mon to have. Unfortunately, Hawlucha has nothing that takes advantage of Mold Breaker (i.e. it doesn’t get Ground moves to use against Levitate Pokemon), so that plan is mostly scrapped. That leaves us with Unburden! A fine choice.


If your Hawlucha isn’t holding a consumable item, Limber is actually the next best option. It’s also useful considering Hawlucha’s speed is its greatest asset.

Base Stats:

78 / 92 / 75 / 74 / 63 / 118

Okay, so after you’ve seen Hawlucha’s stats you can start to understand why not many people are already using it. That and the weaknesses. But Talonflame gets away with an even lower base 81 attack, commonly running Life Orb or Choice Band. Talonflame’s greatest advantage is its Priority Brave Bird giving it the edge in speed. But! Hawlucha has a more powerful STAB in Sky Attack. Sure it’s a one time use, whereas Talonflame can usually launch two base 120 attacks in a game, but Talonflame doesn’t get access to Fighting moves. You know what does? Staraptor with Close Combat. Oh, and it has much higher attack, Intimidate, and still has access to Brave Bird.

Admittedly, Hawlucha’s middling stats leave it in between a rock and a hard place. It faces stiff competition from one of the most-used mons in VGC, and another bird that sees a fair bit of play for niche purposes Hawlucha shares. Hawlucha’s speed gives it an advantage over Staraptor, allowing a speedy Choice Band set. Adamant Hawlucha hits 170 speed, just enough to outspeed 252+ Garchomp. Jolly is useful to outspeed Pokemon in the 105-115 speed tier, and Adamant Talonflame if it’s using Flare Blitz. Not to mention outspeeding stuff like Scarfed 252+ TTar and Manectric (non-Mega speed).

Admittedly, Tomohawk looked
pretty cool..

That said, if Hawlucha is going to have an advantage over Talonflame or Staraptor, it’s got to come from a versatile movepool.

Moves:

Boy does Hawlucha have a crap-ton of viable moves! Most come from its level-up as well, so you can tell Pokemon really tried to make this thing versatile as its niche. Though a lot of these moves don’t seem like they’re likely to be used, I can think of unique sets for each of them where they really shine. As such, I’ll be splitting them up into their purposes, and maybe add a note as to why they’re worth considering on Hawlucha. I’ll go over what sets I’d use them on later.

Setup

Because of Hawlucha’s ability to disrupt, you can sometimes catch an opponent switching out to prevent being Encored, or Protecting to avoid a Sky Drop or Taunt. As such, Hawlucha may find an opportunity in the first couple turns of the game to set up. Listed below are moves that each have their own purpose.

Hone Claws
– The accuracy boost is nice for High Jump Kick and Rock Slide
Swords Dance
– Unadulterated power
Entrainment
– A niche specific to Hawlucha. Entrainment can give Mold Breaker to a partner like Garchomp for Earthquake abuse, and is an ideal user as it has ground immunity. You can also rob Mawile and Kangaskhan of their powerful Abilities, though you might as well just hit the Kangaskhan if you’ve got the chance.

Disruption

Hawlucha has so many viable Disruptive moves that it’s really up to you to decide what works best for your team. Below, I’ve ranked these moves by potential for use on any set. As such, in the sets I list below, if it says “Disruption” as a moveslot, any of the moves listed here could be viable, but I would look to the higher-ranked options first for whatever your team needs.

I… I don’t even know…

Highly Useful

Encore
Quick Guard
Taunt
Sky Drop

Useful

U-Turn
Low Sweep
– For speed control like Icy Wind. Also offers 100% accurate STAB fighting move to avoid relying on High Jump Kick, which is especially handy in the face of Protect.

Niche Useful

Fling
– A pseudo-Fake Out while consuming its item for Unburden. Quite good! But not widely applicable.

Feather Dance (Hawlucha is too frail)
Swagger
Entrainment

Damage Output

High Jump Kick
Sky Attack
Acrobatics
Rock Slide
Stone Edge

Other/Niche

Protect/Detect
Endeavor
Roost
Ally Switch

Sets:

Sky Attack
Jolly/Adamant @ Power Herb
4 HP / 252 Atk / 252 Spd
– Sky Attack
– High Jump Kick
– Rock Slide / Disruption
– Detect / Disruption

I think this is a textbook example of Pokemon pre-packaging something they want people to try out. You’ll find this Hawlucha in the Battle Maison, and it’s not like it’s bad… But the only advantage this set boasts over the Attacker set below is the single use of Sky Attack which boosts your speed, at the cost of reduced damage from your other moves. If you opt for an Adamant nature, you’ll be able to get away with it, as Adamant Hawlucha still outspeeds Garchomp, and hits hard enough to KO Charizard with Rock Slide. But this Hawlucha will only KO Mega Kangaskhan 50% of the time with High Jump Kick, or more accurately, 45% of the time accounting for misses. I’m not a fan.

Attacker
Jolly/Adamant @ Life Orb/Choice Band
Limber
4 HP / 252 Atk / 252 Spd
– High Jump Kick
– Rock Slide
– Disruption/Stone Edge
– Protect/Sky Drop

With the Life Orb boost, Jolly Rock Slide will OHKO any Mega Charizard Y, whereas unboosted you fall short with only a 43.8% chance against 252 HP Charizard-Y. Jolly boosted High Jump Kick will OHKO 252 HP Mega Kangaskhan with room to spare, while it has 0% chance unboosted. If you want the speed advantage that Jolly brings, then you’ll want the boost to get through.

After that, any disruption move is useful for the Life Orb set. The move to choose would largely depend on your team and potential partners. With a Choice Band, Stone Edge is an option to avoid Wide Guard shenanigans. Sky Drop is another useful move for Hawlucha with either item, and a banded Sky Drop can deal >75% to Amoonguss while removing it from the field for a turn.

I can haz King’s Rock?

Fling
Jolly @ King’s Rock/Razor Fang
Unburden
252 Atk / 252 Spd
– Fling
– Encore
– Setup / Disruption
– High Jump Kick / Acrobatics / Quick Guard / Protect

This set is just brimming with possibilities. By having access to Fling, you can effectively Fake Out an opponent on any turn of your choosing as long as you’re faster. The possibility of being flinched in the middle of a battle is not something most players prepare for. In a Best-of-3 scenario, the threat of Encore can punish players that Protect against Fling. And with the threat of Encore you can set up a Hone Claws or Swords Dance to threaten big damage with High Jump Kick. The lack of protect in that moveset is alleviated by Fling.

The third move could also be a Disruption move such as Sky Drop, Taunt or Low Sweep. All are useful for their own reasons. Sky Drop is just generally great disruption coming from a fast user like Hawlucha. Taunt is also a niche use which could be quite handy against Amoonguss. If you’re worried about Rage Powder, you can Taunt Amoonguss turn 1, then Encore it turn 2 to completely cripple it. Taunt is also useful to prevent the usual suspects (e.g. Will-o-Wisp, Spore). Low Sweep gets a nod here as a way to punish a Pokemon switching-in by reducing its speed by one stage and dealing a bit of damage.

Finally, High Jump Kick is Hawlucha’s most powerful non-conditional move, and takes advantage of Hone Claws. Acrobatics can also work on this set after you use Fling, but requires a Fling before it’s useful. Quick Guard is a niche move that can always be considered depending on your partner. In this instance, Quick Guard is also useful to protect yourself from priority moves or Pranksters attempting to bypass your quick Encore. Protect is just a standard and good option.

The only other use of Fling this Hawlucha can run is with Hard Stone. Hard Stone gives Fling base 100 damage which will OHKO Mega Gengar, but that’s probably its best use. Hard Stone also allows you to run Rock Slide and KO M-Charizard Y without using up Life Orb or Choice Band on your team. That said… King’s Rock is better 99% of the time.

Endeavor
Jolly @Focus Sash
Unburden
252 Atk / 252 Spd
IV’s: 0 HP, 0 Def, 0 SDef
– Disruption / Sky Drop
– Endeavor
– Quick Guard
– Disruption / Protect

This set is a more dedicated support set that doesn’t concern itself as much with damage output. The idea here is to threaten disruption via Sky Drop (or something else like Encore) as your primary purpose. After you go down to 1 HP, you receive the Unburden boost and threaten a very fast Endeavor to 1 HP. This is Hawlucha’s way of saying “I’m going down swinging.” Because after Unburden Hawlucha will be so fast, this set partners very well with spread move partners like Rock Slide, Earthquake or Heat Wave users, even if they’re scarfed (e.g. Garchomp, Mamoswine, Chandelure).

Quick Guard is a staple on this set as you bait priority moves like nobody’s business at 1 HP. Being able to protect yourself from them, and also offer protection for a (scarfed) partner is just a better use of a moveslot. Both of my above examples (Mamoswine and Chandy) want protection from Aqua Jets and Sucker Punches. Hawlucha can always run Protect if you have no reason to protect your partner on that turn, but I wouldn’t want to drop Quick Guard from the set to do it.

Is this really the best entrainment
animation the internet has to offer?

Entrainment
Jolly @ King’s Rock
Mold Breaker
4 HP / 252 Atk / 252 Spd
– Entrainment
– Fling
– Disruption / High Jump Kick
– Disruption / Protect / Quick Guard

This set is very much a niche concept. The idea is to use Hawlucha for the purpose of giving Mold Breaker to the the opponent’s Rotom-A or other Levitate user, and Earthquake with Pokemon like Garchomp.

My theoretical Garchomp partner might run Swords Dance instead of a move like Dragon Claw or Rock Slide, taking advantage of Hawlucha’s Fling or threat of Encore forcing switches (or both). A +2 Garchomp with Mold Breaker will be doing whatever it wants to whoever it wants, barring Scarf users. You can also use Quick Guard here to protect Garchomp or Mamoswine from incoming priority (e.g. Ice Shard, Aqua Jet). Dragon Dance users like Mega Tyranitar are also worth noting as a potential partner.

You can also Entrain Mold Breaker onto your partner if you think it’s worth it. Or you can rob opposing Pokemon of their useful abilities. This is a much more niche use of the move, but getting rid of Huge Power on Mawile or Azumarill is a neat play. Additionally, you can get rid of Lightningrod from Raichu, Manectric or Rhydon and free your partner for use of Electric moves. Watching an opponent kill their own Telepathy Gardevoir with Earthquake is an invigorating rush. As Kangaskhan isn’t OHKO’d by Jolly High Jump Kick without a boost, Entrainment can also remove Parental Bond. But HJK still does 83-99%, so getting the damage on will almost always be more worthwhile.

Quick Guard is useful to protect yourself from the usual suspects, but also from Prankster users that might Burn or Charm you.

Teammates:

I’ve alluded to potential teammates throughout this article, but here they are stated more concretely.

With access to Quick Guard, Hawlucha can protect partners from Sucker Punch from Kangaskhan/Mawile or Brave Bird from Talonflame. Scarfed Pokemon like Gardevoir really don’t want to face either, and mons like Amoonguss and M-Vensuar don’t want to deal with Talonflame.

I agree with everything you say

Outside that, one of Hawlucha’s greatest assets is being one of the fastest non-Prankster Encore users in the format (Alakazam and Accelgor are both faster, but what kind of scrubs would want to use them?). Okay… so that’s really not that impressive I guess. But a fast Encore is nonetheless a great mind game to play with. Tony Cheung recently won Washington Regionals with a Raichu/Gengar team. Hawlucha could function very similarly to Raichu, but with more versatile support, the potential for real damage, and a slower “Fake Out” in the form of Fling. With the advantage that you can Flinch them on any turn, not just the first.

Hawlucha also reminds me of Mienshao in a lot of ways. So it can definitely replace Mienshao to bring a team moves like Sky Drop and Encore.

Hawlucha can be added as a check to Mega Kangaskhan. As a fast Pokemon capable of OHKO’ing the parent-child combo, it’s worth consideration. I wouldn’t call it a counter because of its frailty, but it resists Dark so Sucker Punch won’t be finishing you off. It also gets Encore to Encore their Fake Out (or failed Sucker Punch), or the Protect that they used to avoid High Jump Kick.

Counters:

Aegislash is a big pain to deal with, as you may notice my Hawlucha sets don’t really run… anything… that can deal with it. Jokingly… Hard Stone Fling BARELY OHKO’s 252 HP Aegislash-Blade. Now, you can Encore their King’s Shield or Substitute, but that requires support to force them to King’s Shield/Substitute.

So outside of Aegislash, what else beats Hawlucha? Well, as a support Pokemon it’s not really straight-up “countered.” But a lot of things can deal with Hawlucha. In the same way, Hawlucha isn’t trying to beat them. It’s trying to support a partner that can beat them.

Conclusion

With a litany of neat niche moves like Encore, Sky Drop, Taunt, Quick Guard, and Fling, Hawlucha has a lot it can bring to a team. It also offers a powerful High Jump Kick, capable of removing Kangaskhan’s from the field. Though its base attack is lower than most threats, its impressive speed lets you run an Adamant nature if desired, which is the same as a Jolly Pokemon with a base 106 Attack stat and 103 Speed.

So if you’re playing around with Encore or need a versatile Pokemon that your team can abuse, Try out Hawlucha. There’s a lot more to this thing than meets the eye!

Cheers,
Mark

Pokemon of the Week #1: Bisharp

Hello Hat Lovers!

Today we’ll be starting the weekly series Pokemon of the Week. The previous Charizard and Aegislash articles have been retroactively made a part of the series so our first official article shall be the third in the series.

The first Pokemon for the official series is Bisharp. Bisharp is a Dark/Steel type introduced in generation five. Bisharp is known for two things: It’s ability Defiant and Sucker Punch. Bisharp’s name has often been noted as similar to a Bishop from Chess, which is fitting because Bisharp makes the game more like a chess match with all the prediction it brings to the match.


Ability
Bisharp has three abilities, Defiant, Pressure, and Inner Focus. The only ability Bisharp should ever consider is Defiant. Defiant is the main selling point of Bisharp as a Pokemon. If Bisharp’s stats are lowered by an opponent its attack is boosted by two stages. This means Intimidate gives Bisharp a +1 boost to attack instead of a -1 drop. Defiant will make Salamence and other Intimidate users think twice about leading against a team with Bisharp.

Attacks
The most important attack for Bisharp is Sucker Punch. Sucker Punch is a base 80 Dark type priority move that only works if the target was using a damaging move that turn. With Bisharp’s fantastic attack stat it will be able to KO the fast and frail Pokemon before they can attack back.

Iron Head is the standard Steel STAB move for Bisharp. It deals great damage against Gardevoir and Tyranitar, as well as Pokemon that resist Dark.

From here another Dark move is often used so Bisharp doesn’t need to rely on Sucker Punch as its only Dark move. Night Slash has been the standard in the past, with 70 base power and a heightened critical hit rate.

Another move that’s been seeing a rise in popularity lately is Assurance. Assurance has a base power of 60 but if the target has taken damage already Assurance deals double damage. Between the initial damage that triggered Assurance the effective base 120 damage Bisharp will be able to finish off most opponents.

Protect is a standard move for VGC that Bisharp should carry. Another option to use either alongside or instead of Protect is Quick Guard, which blocks all priority moves targeting either of your Pokemon. This allows Bisharp to block opposing Sucker Punch and Brave Bird, as well as shut down any Prankster Pokemon trying to ruin your day with Swagger.

Standard Bisharp

Bisharp @ Life Orb
Ability: Defiant
EVs: 4 HP / 252 Atk / 252 Spd
Adamant Nature
– Sucker Punch
– Iron Head
– Assurance / Quick Guard
– Protect / Quick Guard

This is what I consider to be the standard way to play Bisharp. Life Orb boosts your damage output to help Sucker Punch pick up important KOs on Pokemon such as Salamence, as well as make Assurance an even greater threat. 252 Attack should be used on every Bisharp. I’ve opted for 252 speed to get the jump on Rotom, Tyranitar, and Gardevoir (barring Choice Scarf sets for these Pokemon.) The last 4 went into HP for no special reason.

Depending on the teammates you pair Bisharp with you may need to lower its speed so that they can attack first and give Assurance full power.

One neat idea employed by Wolfe Glick of Eggy Emporium was to use an HP IV of 29 and 0 HP EVs to reach an HP of 139. This reduced Life Orb damage by 1 so his Bisharp would have more HP in the long run. While this idea is clever I think its a bit excessive and wouldn’t bother breeding for it. I doubt the extra recoil makes the difference in the long run.

Choice Band Bisharp

Bisharp @ Choice Band
Ability: Defiant
EVs: 4 HP / 252 Atk / 252 Spd
Adamant Nature
– Sucker Punch
– Iron Head
– Assurance
– Sleep Talk

With Bisharp’s massive attack stat and strong priority move Choice Band makes a lot of sense. Sleep Talk has taken the place of Protect to help deal with Dark Void and Spore.

Swords Dance Bisharp

Bisharp @ Focus Sash
Ability: Defiant
EVs: 4 HP / 252 Atk / 252 Spd
Adamant Nature
– Sucker Punch
– Iron Head
– Swords Dance
– Protect

Swords Dance is the most dangerous set for Bisharp, for both players. Its tough to get a free Swords Dance but once you do your opponent is only going to be more afraid of Bisharp. Because of Swords Dance I’ve given Bisharp a Focus Sash to allow it to survive a hit instead of an item that boosts Bisharp’s power.

Teammates
Because of Defiant Bisharp punishes Intimidate users, so a team full of physical attackers is a good place for it. With a Defiant boost Bisharp OHKOs Salamence with Sucker Punch, giving its partner safety from the scarfed menace.

If you’re using Assurance then you’ll benefit from having faster Pokemon with spread moves such as Charizard or Scarf Chandelure with Heat Wave, and Garchomp or Salamence with Rock Slide. Assurance is a great move but you don’t want to get caught double targeting a Pokemon using Protect.

Bisharp also works well with Pokemon that don’t enjoy facing Sucker Punch or Talonflame if it carries Quick Guard. Being able to shut down any Prankster is a godsend, and prevents the opponent from going Swagger GG against you.

For the Swords Dance set you’ll want partners that can help Bisharp set up, such as Kangaskhan with Fake Out or Greninja with Mat Block.

Counters
Pokemon that can out speed Bisharp and aren’t OHKO’d by Sucker Punch can keep it in check. Bisharp will have a hard time pulling its weight when staring down a Garchomp, unless its partner can deal with it. Kangaskhan can tank a Sucker Punch and KO back with Power-Up-Punch. Scarf Tyranitar isn’t afraid of Sucker Punch at all and can OHKO with Fire Blast.

Rage Powder and Follow Me prevent Sucker Punch from working properly, but most users are slow and must be wary of Assurance.

Rotom-H is a great answer to Bisharp, able to burn it or OHKO with Overheat. Caution must be used as Rotom-H will be KO’d by Assurance after taking chip damage earlier in the turn.

Conclusion

Bisharp is a strong force in the metagame, however if played incorrectly it will be dead weight on a team. It can’t just be slapped onto a team and expected to preform well, it needs to be thought about in relation to each member of the team, from which threats it covers for its teammates to the threats that its teammates will need to cover themselves, as well as the effects of having Defiant in team preview.

If you liked the series or want to see your favourite Pokemon featured next week let us know!

~Max

Pokemon Analysis: Aegislash

Hello Hat Lovers!

Today I have another Pokemon analysis. I’ll be looking at Aegislash and its usage in VGC 2014. It is said in the Pokedex that Aegislash recognize those destined to be kings. This is fitting as Aegislash has become the king of the format, or at least one of the most used Pokemon.

Pokemon Info:

Aegislash is a Steel/Ghost type, giving it a plethora if resistances and immunities as well as four weaknesses. In Shield form Aegislash’s base stats are 60/50/150/50/150/60 and Blade form’s base stats are 60/150/50/150/50/60. Aegislash switches between it’s two forms with the Ability Stance Change. Whenever Aegislash uses a damaging attack it changes to blade form and whenever it uses King’s Shield it switches to shield form. This gives Aegislash and effective 720 base stat total when King’s Shield is used properly. The general strategy with Aegislash is to tank hits in shield form and then switch into blade form when you attack, then use King’s Shield to go back into shield form. If you can catch an opponent using a physical attack on the turn you use King’s Shield then their attack with be lowered by two stages. The downside to this is that Aegislash is reliant on King’s Shield, making it predictable.

Moves:

At the start of the season Aegislash was primarily used as a physical attacker carrying Swords Dance, Shadow Sneak, and Sacred Sword. As the format developed this set wasn’t found to be very effective as King’s Shield doesn’t block status moves meaning Aegislash had no way to prevent itself from being burnt. The metagame also shifted away from physical attackers, so King’s Shield didn’t get as many opportunities to lower the opponent’s attack.

Players started switching over to specially based Aegislash, leading us to the sets we have today. Aegislash generally carry Shadow Ball and King’s Shield, while the last two moves are up for debate.

Flash Cannon and Sacred Sword are used as the second attack to round out coverage with Shadow Ball. Which move is better is up to player preference. Sacred Sword hits Kangaskhan, Tyranitar, Bisharp, and Pyroar harder while Flash Cannon does more damage against Mamoswine, Florges, Aromatisse, and situations where Aegislash is burnt or Intimidated. Since Shadow Ball has such amazing coverage all by itself, the second move often isn’t an important choice. At Washington Regionals I chose Sacred Sword over Flash Cannon and never ended up using it, and I never found myself wanting Flash Cannon either.

For the third move we have a couple options. Substitute is a popular choice, getting a Substitute up allows Aegislash to apply far more pressure then it would’ve without one and lets it block Spore from Amoonguss as well as Leech Seed from Ferrothorn. Wide Guard can be used to help support the team, blocking Earthquake, Heat Wave, Rock Slide, and Muddy Water from your opponents, as well as letting you block your own Earthquake. Hidden Power Ice can be used to KO opposing Garchomp and Salamence. Shadow Sneak is an option for a priority attack, but that puts you into blade form before your opponent attacks.

Item:

Aegislash commonly uses Leftovers on Substitute sets. Some player opt for Weakness Policy in order to make Aegislash a major powerhouse. These are the two most common items for Aegislash to carry. Other items include Sitrus Berry and Lum Berry.

Standard Aegislash:
Aegislash @ Leftovers
Ability: Stance Change
Level: 50
EVs: 252 HP / 4 Atk / 4 Def / 172 SAtk / 76 SDef
Quiet Nature
IVs: 0 Spd
– Shadow Ball
– Sacred Sword / Flash Cannon
– Substitute
– King’s Shield

This is the Aegislash I used in Washington. With minimum speed my Aegislash moves after the opponents (or at least speed ties) and gets to Shadow Ball second, while the opponent is in blade form. 76 SDef allows Aegislash to survive Mega Charizard-Y’s Heat Wave in the sun, as well as every Shadow Ball / Dark Pulse in the format.

Threats to Aegislash:

Aegislash is highly allergic to Fire, and will not enjoy facing Rotom-H, Charizard, and other Pokemon using Fire attacks. Burning Aegislash makes it easier to deal with, and Aegislash can’t stop a faster Pokemon from burning it. Garchomp is also a major pain for Aegislash and threatens it with Earthquake. Ghost and Dark Pokemon also threaten Aegislash, but they need to be wary of Weakness Policy and a Shadow Ball / Sacred Sword in retaliation.

Teammates:

Aegislash isn’t a Pokemon that has a hard time fitting onto teams. One of Aegislash’s greatest strengths is that Kangaskhan loses to it one-on-one. For this reason I often consider it on teams that don’t have an easy way to beat Kangaskhan. If you opt for a Wide Guard set Aegislash supports both Mega Evolutions of Charizard, as well as saving you form Rock Slide in general.

Aegislash is often used as part of the “fantasy core,” consisting of Salamence, Gardevoir, and Aegislash. The core can be formed with any Dragon, Fairy, and Steel type, but those three are the most common three to be used. In this core Aegislash switches in on Dragon, Fairy, and Steel attacks for the other two, and Salamence switches in on Fire and Ground moves.

Aegislash fits in well on a rain team. Rain reduces the damage from fire attacks, and Garchomp has a tough time against rain teams that constantly threaten it with Draco Meteor and Ice Beam.

Conclusion:

Aegislash has risen to the level of Garchomp, Rotom, and Kangaskhan as the top Pokemon of VGC, where it will likely stay for the rest of the season.

Pokemon Analysis: Mega Charizard X

For those who refuse
to praise the sun we have
Mega-Charizard-X

Hello Hat Lovers!

After seeing so many Charizard-X at Washington Regionals and having toyed around with the idea myself I wanted to write about the alternate mega form for Charizard. Mega-Charizard-X becomes a Fire/Dragon type when it evolves and gains the ability Tough Claws, which boosts the damage of its contact moves by 33%

Mega-Charizard-X’s base stats become 78 HP / 130 Attack / 110 Defence / 130 Special Attack / 85 Special Defence / 100 Speed. With these stats it can attack from both ends of the spectrum, but because of the aforementioned ability Tough Claws its physical attacks are preferred.

One of the best reasons to use Mega-Charizard-X is that most opponents will assume Mega-Charizard-Y and prepare for sun. Rotom-H is a great counter for Mega-Charizard-Y but will falter against Mega-Charizard-X, and surviving that Rock Slide and striking back after a Dragon Dance gives the user a ton of momentum. On Showdown I’d often find myself thinking that I’d be screwed if my opponent used Mega-Charizard-X over Y. Mark told me I was too quick to assume Mega-Charizard-X. After my run at Washington Regionals where I faced 3 Mega-Charizard-X I feel my assumptions were justified, though that’s mainly because my team dealt with sun fairly easily. I used a Charizard-Y on my team for the sole purpose of bluffing sun, but if I used a Mega-Charizard-X I would’ve still had this going for me and I’d have another option for opposing Rotom-H (such as the one that beat me in top 4.) Charizard-X also works well as a part of the classic double dragon strategy. Mega-Charizard-X is the only Dragon in VGC 2014 that isn’t weak to Fairy or Ice, so it can be paired with Salamence or Garchomp without doubling up on your all of your weaknesses.

The set:

The most common set for Mega-Charizard-X is Flare Blitz, Dragon Claw, Dragon Dance and Protect. Fire and Dragon give it near perfect coverage against the format, it only fails to deal neutral damage against Azumarill and Carbink. Dragon Dance puts Charizard ahead of Garchomp in speed and gives it the opportunity to speed tie with Salamence. There are plenty of other moves that Charizard can use but I couldn’t see myself dropping any of the four main moves to accommodate them.

As for the effort values we need to address what you want Mega-Charizard-X to do. Out-speeding Scarf Salamence is important but outside of that maximizing it’s speed is unnecessary. If your team has a good way of dealing with Scarf Salamence I’d recommend the following set:

Charizard @ Charizardite X
Ability: Blaze
Level: 50
EVs: 132 HP / 156 Atk / 4 Def / 4 SDef / 212 Spd
Adamant Nature
– Flare Blitz
– Dragon Claw
– Dragon Dance
– Protect

This spread can survive Garchomp’s Dragon Claw 100% of the time and then survive Rough Skin damage 15/16 times. Unfortunately there is little hope of surviving a Draco Meteor
from Salamence. The speed puts it above Jolly Gyarados and after a Dragon Dance it out speeds everything lacking a boost of its own. The rest was put into attack. If you find yourself having trouble against Salamence or even other Mega-Charizard-X then you can try a simple 252/252 spread and even consider using a Jolly Nature.

If you want to focus more on bulk while still getting the OHKO on Garchomp and Salamence without a Dragon Dance then you can use a spread of 180 HP / 108 Atk / 4 Def / 4 SDef / 212 Speed.

Partners:

When making a team based around Mega-Charizard-X we need to find a good answer to Salamence and Garchomp. Both of which are naturally faster and threaten to OHKO with their Dragon moves.

Mega Charizard-X’s greatest threat
is Salamence, so we’ll fight
Dragon with Dragon

A great partner for Charizard is Salamence. By giving it a Timid nature and a Choice Scarf you’ll be faster then all the other Dragons in the format (or speed tie with them.) Salamence brings Intimidate support to the table, which compliments Mega-Charizard-X’s improved physical bulk. Salamence takes care of Garchomp, which threatens Charizard-X with super effective damage from all of its moves. As mentioned before Salamence allows you to use the double dragon strategy while only have one weakness to Ice and Fairy.

Or we can use Bisharp
as a “Silver Bullet”

Bisharp is a good partner for Charizard because it scares away Salamence and other Intimidate users. At +1 with a Life Orb Bisharp can OHKO Salamence and keep it from KOing Charizard right off the bat. I’ve never been a fan of Bisharp, its too frail for my tastes and I think it makes the Mega-Charizard-X too obvious. Bisharp also shares a weakness to Ground with Charizard, meaning it won’t help much against Garchomp.


Aerodactyl is another solid partner for Charizard-X. It can support Charizard with Sky Drop and Wide Guard to help it set up and stop incoming Earthquake and Rock Slide. Aerodactyl is also a common partner for Charizard-Y so it doesn’t tip your opponent off.

Fake Out users also make good partners. Mienshao has access to Wide Guard and Quick Guard to protect Charizard, as well as High Jump Kick to KO any Kangaskhan or Tyranitar that try to ruin your day. Raichu has access to Encore and redirects Electric attacks via Lightning Rod.

Conclusion:

With the amount of Charizard-X I’ve seen recently, I have to wonder how popular it’ll be at Nationals. Washington showed us that Mega-Venusaur and Mega-Blastoise are both great Mega Pokemon when used correctly and I believe that Mega-Charizard-X is the same. All it would’ve taken to get it to top 4 would be for me to have given my Charizard the wrong right mega stone.

Charizard the benchwarmer: Washington Regionals Top 4 VGC Report

I didn’t praise the sun much this time

Hello Hat Lovers!

I recently made top 4 at Washington VGC Regionals. I’ll give an overview of the team I used and the matches I had. After going 4-3 at Oregon Regionals with our Swaguard team I started working on a new team. After trying out a variety of teams I began to favour sun teams. Whenever I used Venusaur I would give it a Mega Stone in case I didn’t want to bring Charizard. Eventually I found that Venusaur was becoming my preferred Mega. I was close to dropping Charizard from the team entirely, but in the end I decided to keep it in order to scare away Grass and Steel types and give the opponent the impression that I was a run-of-the-mill sun team.
Charizard @ Charizardite Y
Ability: Solar Power
Level: 50
EVs: 4 HP / 252 SAtk / 252 Spd
Timid Nature
– Heat Wave
– SolarBeam
– Overheat
– Protect

When I was deciding on the set for Charizard I figured I wouldn’t use it much, so I scrapped my bulky set so that I could force the speed tie against Mega Kangaskhan and OHKO with Overheat. I brought Charizard to 3 games all day and only Mega-Evolved it once. Had I gone with my set that runs Ancient Power I would’ve been more inclined to bring it, as it would be able to hit Fire types like Rotom-H. In the end Charizard did its job just by being in team preview, the element of surprise goes a long way in swiss and being able to change strategies in top cut won me a game.

Less speed, more fat.

Venusaur @ Venusaurite
Ability: Chlorophyll
Level: 50
EVs: 156 HP / 4 Def / 252 SAtk / 4 SDef / 92 Spd
Modest Nature
– Giga Drain
– Sludge Bomb
– Sleep Powder
– Protect

Venusaur was the star player of this team. I brought it to every game I played. The EVs allow it to out-speed Mega Manectric in the sun, as well as Rotom-A without significant investment. From here I maximized its SAtk and dumped the rest into HP. Considering how little time it spent in the sun I could’ve put all that speed into bulk and be better off for it, but I like having that option.

Unlike in Oregon, this Rotom put in work

Rotom-Heat @ Sitrus Berry
Ability: Levitate
Level: 50
EVs: 252 HP / 68 Def / 156 SAtk / 12 SDef / 20 Spd
Modest Nature
– Thunderbolt
– Overheat
– Will-O-Wisp
– Protect

Rotom-H has recently become one of my favourite Pokemon, providing the team with a myriad of resistances such as Fairy, Ice, Fire, Ground, and Flying. This spread allows it to survive +1 Dragon Claw from Mega Charizard X, which was very popular at Washington. I had been testing Thunder Wave on Rotom as a way to cripple Salamence and Mega Charizard X, but I found that a lot of Pokemon could wall me out without Will-O-Wisp.

Excelleshirt can’t be replaced

Salamence @ Choice Scarf
Ability: Intimidate
Level: 50
EVs: 4 HP / 252 SAtk / 252 Spd
Modest Nature
– Draco Meteor
– Dragon Pulse
– Fire Blast
– Rock Slide

After Oregon I stopped using Salamence because I started using Scarf-Gardevoir on my teams. I couple weeks ago I revisited Salamence and remembered just how good it was. Intimidate makes physical attackers easier to deal with, and Dragon/Flying has an easy time switching in on attacks meant for the rest of my team. During the whole event Dragon Pulse was usually my goto move. I never used Fire Blast once, yet I’m glad I had it. I would’ve considered using Timid Salamence but Mark got me a perfect Modest Salamence and I didn’t want to breed for another one.

You never have to justify
 putting Garchomp on a team

Garchomp @ Lum Berry
Ability: Rough Skin
Level: 50
EVs: 4 HP / 252 Atk / 252 Spd
Jolly Nature
– Earthquake
– Dragon Claw
– Rock Slide
– Protect

Before the event I wasn’t sure if I wanted Garchomp on the team. It works well with the team but leaves me weak to Ice and Fairy. The day before I decided that I was more used to Garchomp then my alternatives. I’m very pleased with how well Garchomp did, I only lost a single game that I brought Garchomp to.

Aegislash @ Leftovers

The best option against Gardevoir

Ability: Stance Change
Level: 50
EVs: 252 HP / 4 Atk / 4 Def / 172 SAtk / 76 SDef
Quiet Nature
– Shadow Ball
– Sacred Sword
– Substitute
– King’s Shield

Aegislash has been very hit or miss for me. Since its reliant on good prediction I was wary of using it early this season. As the season progressed I began to like it for the resistances it brings to the table and the fact that Kangaskhan can’t touch it. Aegislash was used in most battle that I lost, but I’m glad to have it on the team. If it gets a Substitute up then it becomes a big threat. I ran Sacred Sword because it out damages Flash Cannon against Kangaskhan and Tyranitar. The 76 SDef allows Aegislash to withstand Charizard-Y’s Heat Wave in the sun, Mega Gengar’s Shadow Ball and Tyranitar’s Dark Pulse 100% of the time.

Overall the team was effective, even if it was basically a 5 Pokemon team with a distraction. This was the first tournament where I took notes, so I’ll go over my battles as best as I can.

Round 1: Duy Ha

I probably should’ve run one of these myself


I was pretty scared that I’d have to face Duy first round, and to top it off the game was streamed for everyone to see (There goes the Mega Venusaur surprise.)
Duy’s Team: Charizard / Aegislash / Aerodactyl / Amoonguss / Mienshao / Azumarill
This team looks like a sun team at first glance, but I had a feeling things weren’t as they seemed. This game was streamed and you can find the video here:

 I’ll give my thoughts on the first couple turns that I can remember:

The leads were Charizard & Aerodactyl VS Garchomp & Rotom-H. I’ve used his lead before, so Wide Guard and Tailwind seems likely, but I expect his Charizard to be Mega Charizard X. I’m correct on this prediction but he Sky Drops my Garchomp and dodges the Thunderbolt on Aero while using Dragon Dance with Charizard. Next turn he drops Garchomp and Protects Charizard while Aero goes down to a Tbolt and Rough Skin. Mienshao comes in. Garchomp goes down to a Dragon Claw and Rotom-H Protects a Fake Out. I bring in Salamence and Intimidate him. Charizard retreats for Azumarill and I get some damage on Mienshao. From here I’m able to manoeuvre around him with Venusaur and when Charizard comes back in it never gets a turn to use Dragon Dance, so Salamence takes it out when Venusaur goes down.

Win 1-0

Round 2: Teren Baverman
After facing Duy round 1 I was feeling confident.
Teren’s Team: Salamence / Ferrothorn / Aegislash / Rotom-W / Azumarill / Charizard
Nothing seemed special about his team. My Charizard is able to scare away his steel types so I never have to deal with those. His Charizard also ends up being a Mega Charizard X, so at this point I begin to assume that ever Charizard I see will be. This game was pretty easy for me, Venusaur and Rotom dealt with Azumarill and Rotom-W, allowing my Dragons to combat his.

Win 2-0

Round 3: Kacey Traver
Kacey’s Team: Aegislash / Politoed / Kingdra / Manectric / Mienshao / Ferrothorn
I looked at this team and figured that Mega Venusaur would take it apart on its own. I brought Charizard to this game for some reason, even though I lead Venusaur and Mega’d right off the bat. I ended up foddering it for no real gain, but Venusaur easily takes the game on its own.

Win 3-0

Round 4: Hajime Uyesugi
Hajime’s Team: Scrafty / Amoongus / Rotom-H / Azumarill / Charizard / Garchomp
Don’t think you can fool me, that’s a Charizard-X. Oh wait its Charizard-Y. Okay I’ll wreak it with Garchomp and Rotom-H. I managed to win this game without sending in Venusaur, so he was my only opponent not to know what I was doing at the end of the match

Win 4-0

Round 5: Braden Smith
At this point I figure that I’ll make cut if I win this game one more of the next 3 rounds. I heard R Inanimate bemoaning all the Machamp he saw, but since he beat them I thought I was safe. I wasn’t
Braden’s Team: Machamp / Manectric / Aegislash / Gardevoir / Rotom-H / Garchomp
On the first turn I miss a Draco Meteor on Rotom, and this sets the tone of the battle for the rest of the game. He ran a Specs Gardevoir, which takes out Salamence right away but the rest of my team resisted Fairy so I was able to force I switch. The game came down to Rotom-H and Machamp VS Aegislash. If the Rotom can taken the Draco Meteor I could’ve finished it off sooner. The Machamp’s best move against Aegislash was Stone Edge, so I’m confident I would’ve won if it was one on one. But that’s the nature of the game, and it wasn’t even guaranteed that I would win if I hadn’t missed so many attacks. I got my luck back in spades later in the tournament.

Lose 4-1

Round 6: Daryl
Daryl’s Team: Kangaskhan / Meowstic / Talonflame / Charizard / Rotom-W / Garchomp
I see a Kangaskhan and a cat and I think “crap, this isn’t going to end well.” My opponent leads Rotom-W and Cat to my Aegislash and Garchomp. On the first turn Meowstic uses Reflect while Garchomp Protects and Aegislash gets a Sub. Next turn Cat sets up a Light Screen. It is at this point that my fears are alleviated. He starts spamming Thunder Wave after this but His team doesn’t present a threat to me at this point. In the end he brings out Charizard and reveals it to be the Y version and I’m able to clean up with Garchomp and Venusaur.

Win 5-1

For some reason I wrote
 that he had two Scrafty

Round 7: Emilio Orozco
Emilio’s Team: Mawile / Chandelure / Slowking / Scrafty / Rotom-W / Scrafty
This looks like easy Trick Room to me, but I misplay on the first couple turns even though I predicted his moves. In the end its Mawile and Rotom-W VS Venusaur and Rotom-W. Rotom-H Protects and Venusaur misses the Sleep Power and goes down. Had Sleep Powder hit I’d be able to Overheat the Mawile and Giga Drain the Rotom-W for game, but if Sleep Powder could hit ever time I needed it to it would be too good.

Lose 5-2

Round 8: Cory Mitchell
At this point I need to win in order to have a chance at top 16 cut.
Cory’s Team: Charizard / Conkeldurr / Rotom-W / Klefki / Amoonguss / Kangaskhan
This team looks easy to me, but I’m worried about Kangaskhan. He leads Amoonguss and Charizard against my Garchomp and Aegislash, so I expect Charizard-X. I’m right again, and I Rock Slide and Sub against a Rage Powder and Dragon Dance. He takes out Garchomp and Aegislash gets hit off on Charizard. Next turn my Rotom takes the Dragon Claw and Overheats the Amoongus for KO and Aegislash finishes the Charizard. Conkeldurr and Klefki comes out and I’m able to clean up with Venusaur.

Win 6-2

At the end of swiss I have a chance of cut. My losses were late in the tournament and my early wins were good players so I had a good chance. I make it in at 16th seed.

I tallied up all the wins and loses that my Pokemon got me after Swiss

Swiss Statistics:
Charizard: W
Venusaur: WWWWWWLL
Rotom-H: WWWWLL
Salamence: WWWWWL
Garchomp: WWWWWL
Aegislash: WWWLL

Charizard was a part of a battle I won, even if it was only to distract the opponent for a turn. I saw more Charizard-X today then Charizard-Y, and that includes my own usage of it! Venusaur was a part of every battle. Rotom pulled its weight. Salamence and Garchomp were both amazing. Aegislash was a bit weak, but I don’t blame my loses on its performance but the performance of the team and myself as a whole.

Top 16: Mike Suleski (Omega Donut)
Mike’s Team: Venusaur / Azumarill / Aegislash / Rotom-H / Salamence / Garchomp
I’ve seen this exact team online before, but I don’t know if Mike had posted it before or if he copied it for himself. At any rate its a good team and its almost the same as mine, only he has Azumarill and doesn’t bluff sun.

I bring Charizard game 1 for some reason, but I didn’t like how it fared against his leads so I end up foddering it. I lose a very close game with just a -1 Azumarill with a sliver of health left.

Game 2 I go for my regular strategy and manage to get into a favourable position. Salamence surprises me by getting the OHKO on both Garchomp and Salamence without needing a crit for either. My opponent forfeits before seeing my fourth Pokemon.

Game 3 was full of hax for me. I got a crit that mattered, two Rock Slide flinches, and he missed a critical Sleep Powder. I was also pretty good at getting the turn 2 wake when I really needed it, and the time where I got 4 turns it was on Aegislash which wasn’t as important. Throughout the three games he hadn’t missed a Sleep Powder yet, never flinched from a Rock Slide (and I launched a ton of Rock Slides in game 1) so I don’t feel as bad about it as I normally would, but to get as many things in one game must’ve been hard on him. It wasn’t the way I’d like to win game 3 in top cut but that’s the game we play and I’m just glad it didn’t happen to me.

Win (LWW)

Top 8: John Rust
John’s Team: Vaporeon / Garchomp / Azumarill / Aegislash / Charizard / Manectric
I take one look at this team and realize I’m going to top 4. If my Dragons and Rotom and take out the Charizard Venusaur will be able to clean up the rest of his team.

Game 1 he uses Manectric as his Mega, which is fine with me because I have Venusaur and Rotom-H which can’t be touched. I don’t lose a single Pokemon this game.

Game 2 I expect him to change things up and bring Charizard. I play carelessly in this game and end up bringing it down to the wire. I still think its a sure thing but his Charizard goes Mega and Air Slashes my Venusaur. If he got the flinch on that turn he would’ve been able to win the game right there but fortunately Venusaur gets its attack off and we end up with Rotom-H and Venusaur against Charizard, all with very low HP. He goes for the Heat Wave in hopes that he can finish off both of my Pokemon but Rotom survives and finishes the game.

Win (WW)

Tony made me give a Raichu

Top 4: Tony Cheung (ChineseDood)
Tony’s Team: Gengar / Scizor / Gyarados / Staraptor / Rotom-H / Raichu
Tony has been known to bring a lot of creativity to the game and his team reflects this. There are three potential Megas and while I could guess what his Pokemon would do on their own I have no idea what this team’s overall strategy is. Surprise must’ve taken Tony a long way in Swiss but in best-of-three top cut I knew he’d also have the skill to win without it.

Game 1 is complete and utter domination for him. His Gengar goes Mega and uses Perish Song, while Raichu hinders my movements with Lightning Rod, Fake Out, and the threat of Encore. I forfeit at 2-4 so avoid giving away information.

Game 2 I do something I hadn’t done all day: I use Mega Charizard. I get an early KO on Raichu, and he knocks out Rotom-H using Final Gambit Staraptor. I’m able to take the game with Charizard and Venusaur against his Rotom-H and Gyarados. Gyarados didn’t have a good way to damage my Pokemon in the sun, but Rotom was a pain without Ancient Power. I managed to take them out in a close finish.

Game 3 I decide to go YOLO with Charizard & Venusaur and end up against Rotom and Raichu. This completely backfires on me and while I’m able to take out a couple of his Pokemon we end up with Charizard and Aegislash versus Rotom and Gyarados. I don’t have a good way to beat Substitute Rotom-H on my team and its able to win the game for Tony. It was only in this game that I find out Raichu didn’t use HP Ice and my Dragons would’ve been safe to go for a rampage against his team.

Lose (LWL)

Top Cut Statistics:
Charizard: WLL
Venusaur: WWWWWLLL
Rotom-H: WWWWLLL
Salamence: WWWWLL
Garchomp: WWWW
Aegislash: WWLL

Garchomp didn’t lose a single game in cut, and it would’ve put in work in top 4. Charizard won the game that I praised the sun it Mega Evolved in, and lost in the two that it didn’t. Everyone else did about as well as they did in Swiss.

I end the day in 4th place, I get a box and a trophy so I’m happy with how things turned out. It never feels good to lose but I’m glad it was to a friend and I’m glad BC dominated the tournament. It feels great to have done so well after bombing Oregon at 4-3. Plus maybe now Nugget Bridge will post a battle video that I won in.

I did my best and have no regrets, except that I forgot my water bottle at the event. I wish I still had that on the ride home.